New design features!
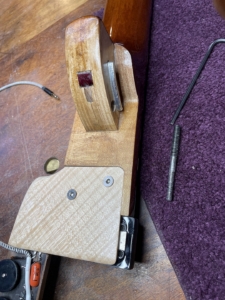
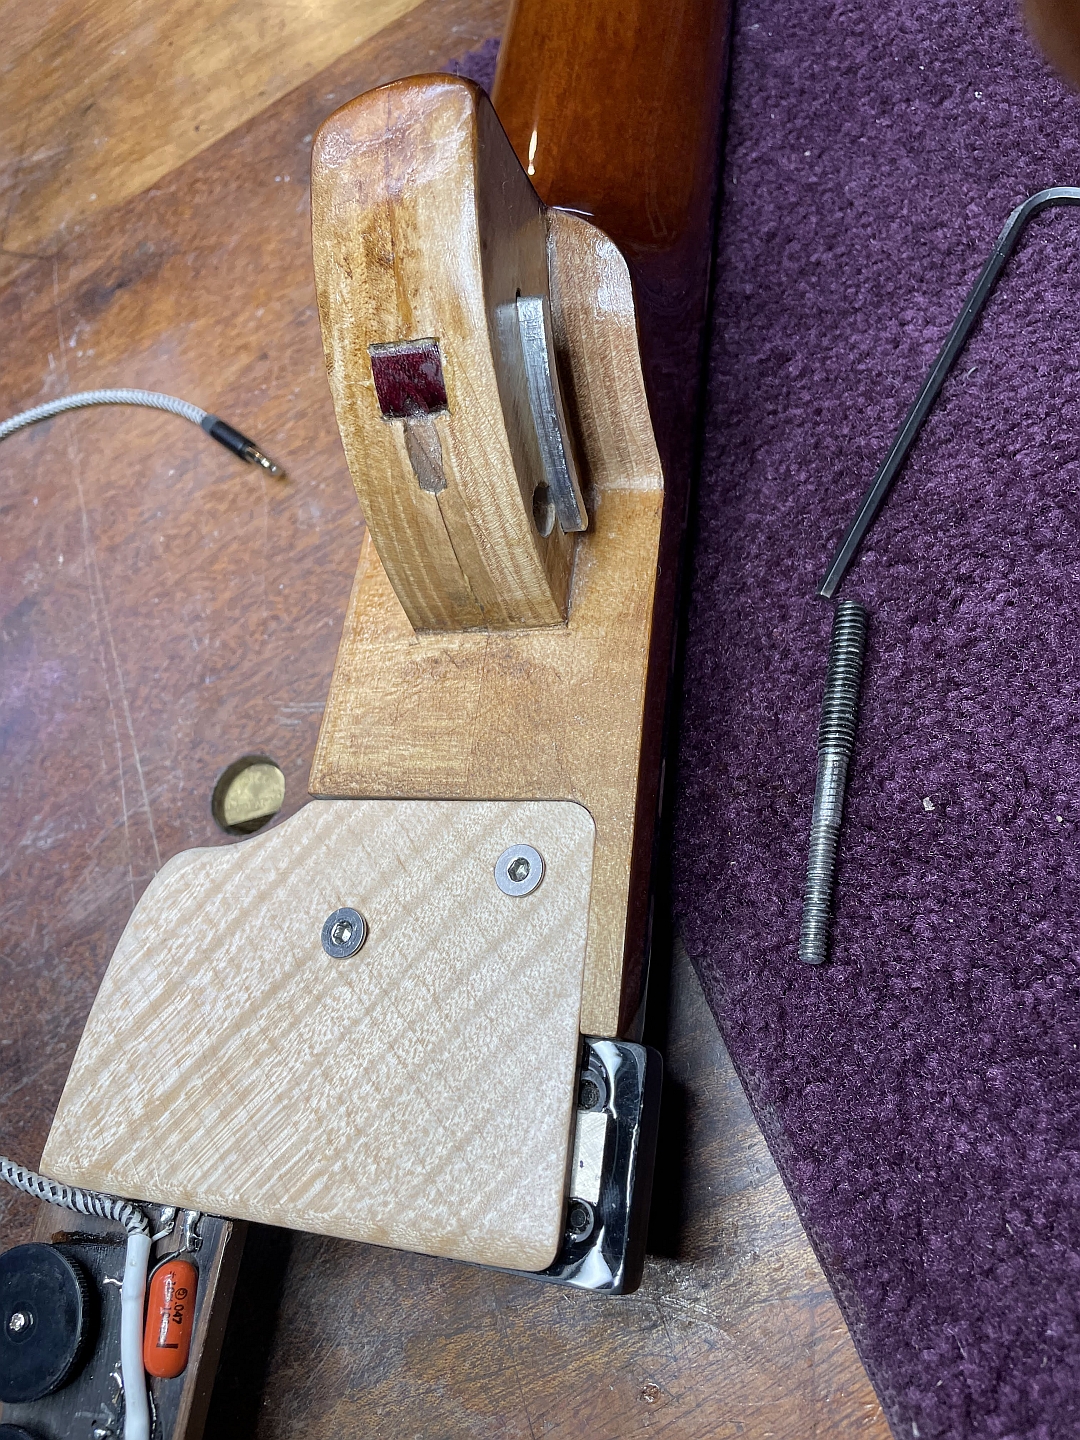
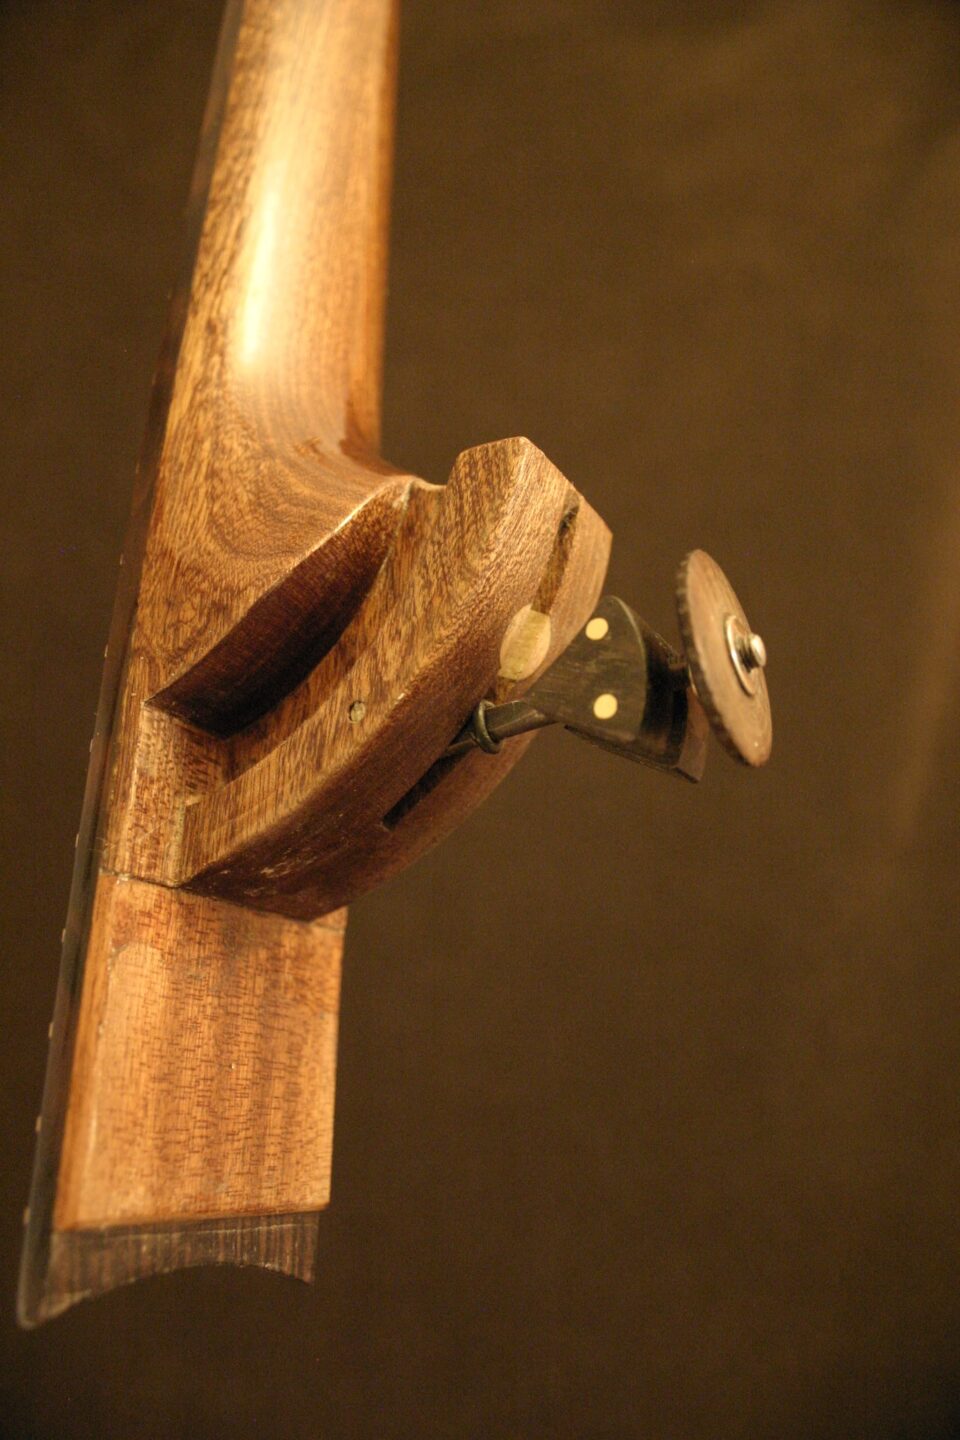
Neck Joint (patent pending)
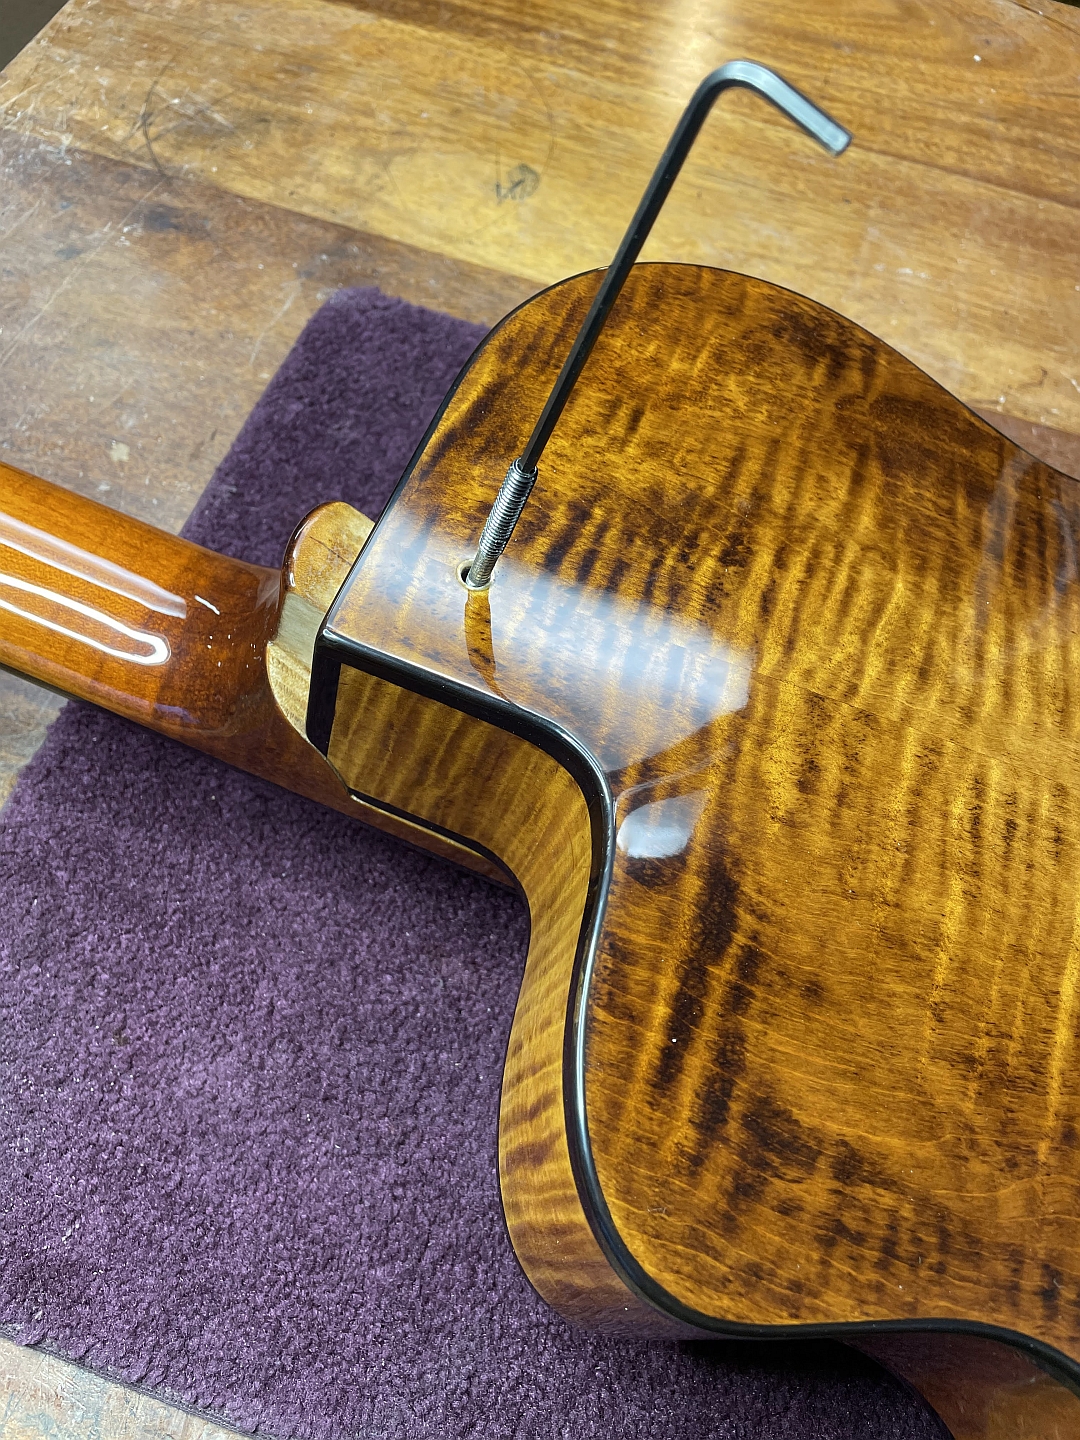
The neck joint I have designed lets the end user adjust the neck angle while the instrument is tuned up. You can change the action without the need to even re-tune. This works because the joint acts like a hinge, and it pivots around a point located 2mm above the 12th fret. Since the pivot is essentially on the string, the strings don’t stretch or go slack as the action is adjusted. It seems impossible at first, but the geometry checks out: imagine a rubber band connecting the tips of the hour and minute hands on a clock reading 6:00. Now imagine the distance the minute hand travels over the next ~20 seconds- the rubber band would seem just as tight as before because the change is so minuscule. ~1° of rotation is all we need to get from a low to a high action, so the string length between nut and saddle essentially does not change.
I have several different adjustment mechanisms in the works, and this thumbwheel design is just one. I will post photos of a sleeker design that uses an Allen wrench to turn an internal set screw soon.
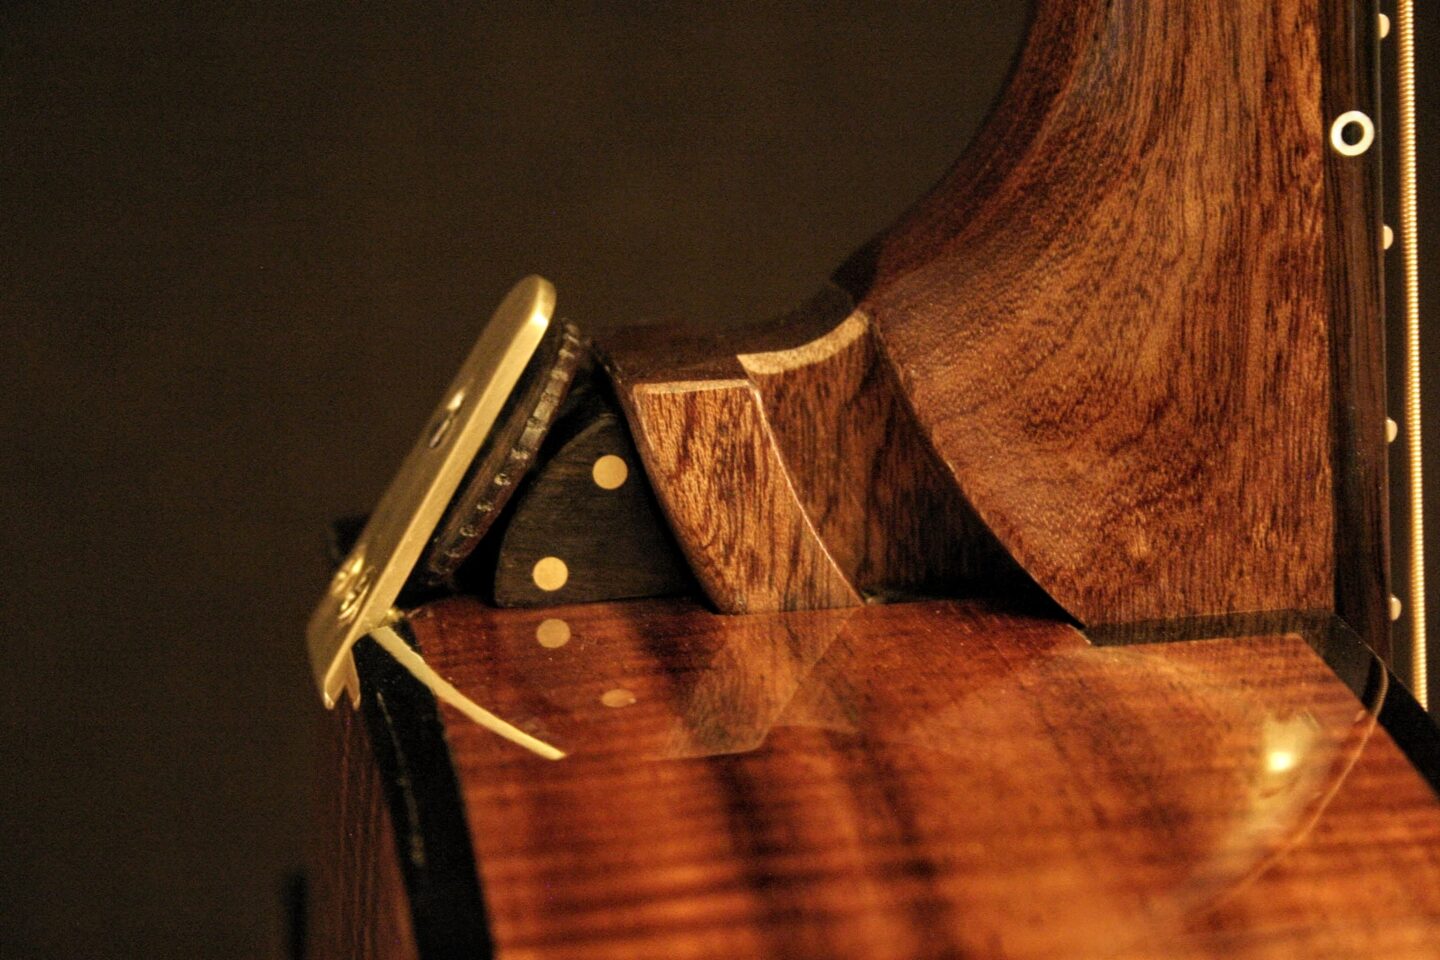
This is my cantilever hinge adjustable neck joint
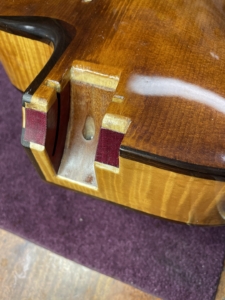
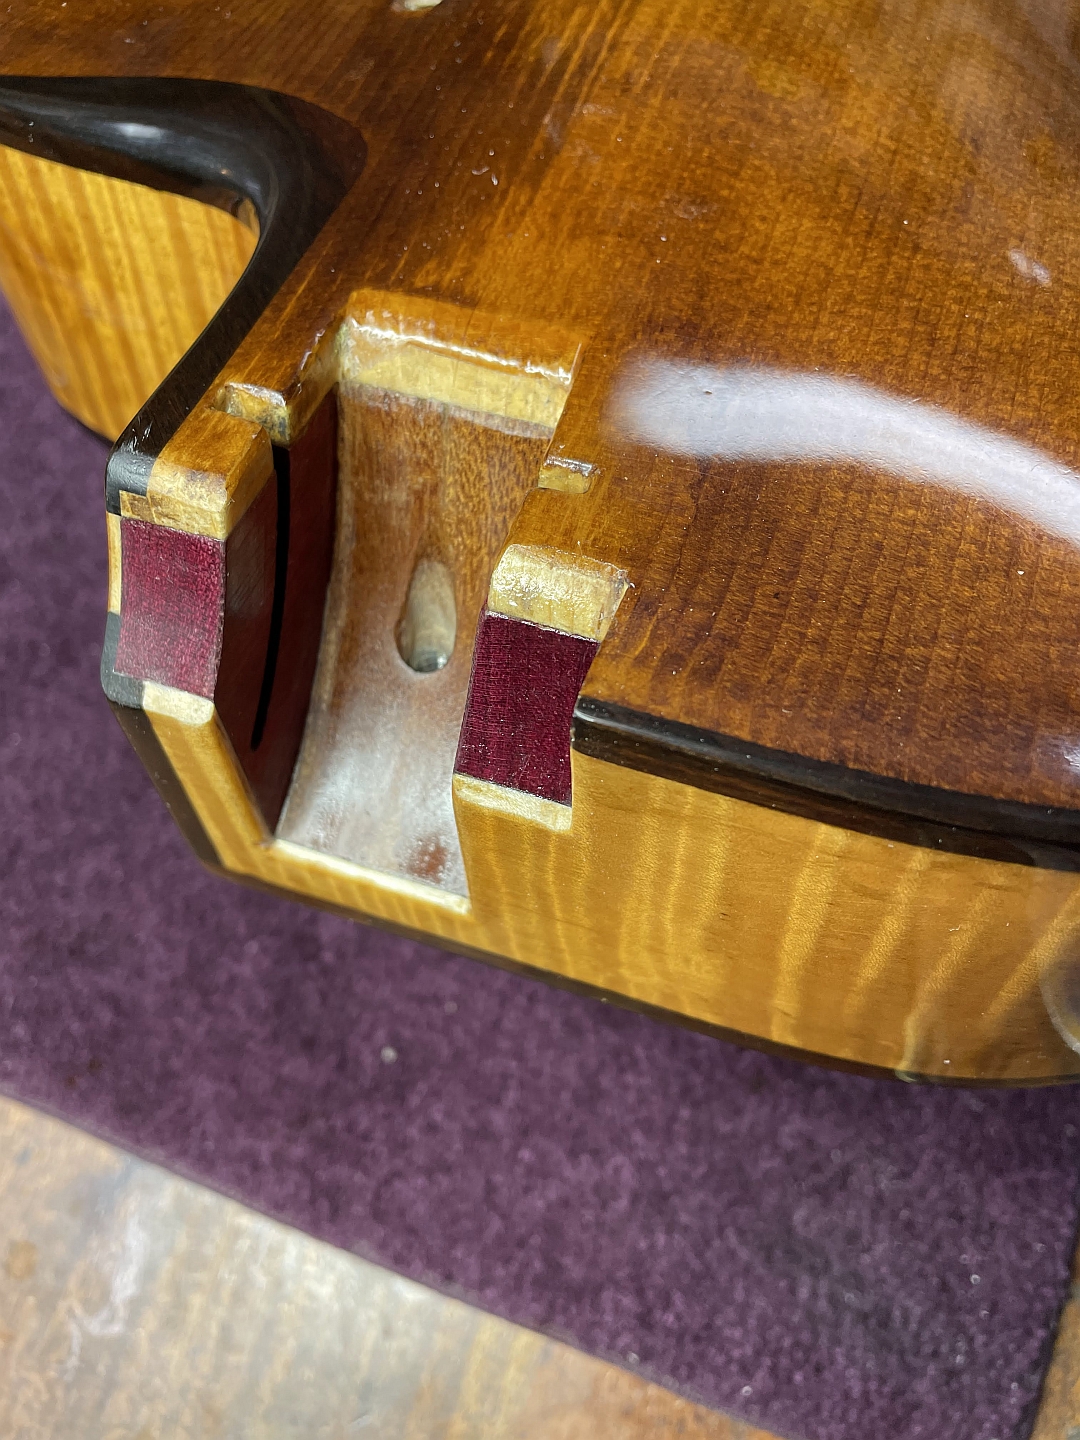
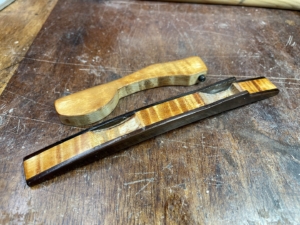
Bridge
I have deconstructed the guitar bridge and rearranged the parts in order to eliminate a glue seam and improve the mechanics. The jobs of a bridge are listed here:
- anchor the strings to the top
- set the height of the strings above the frets
- set the length of the strings so it plays in tune
- brace the top transversely to control how the strings activate the rest of the bracing and top
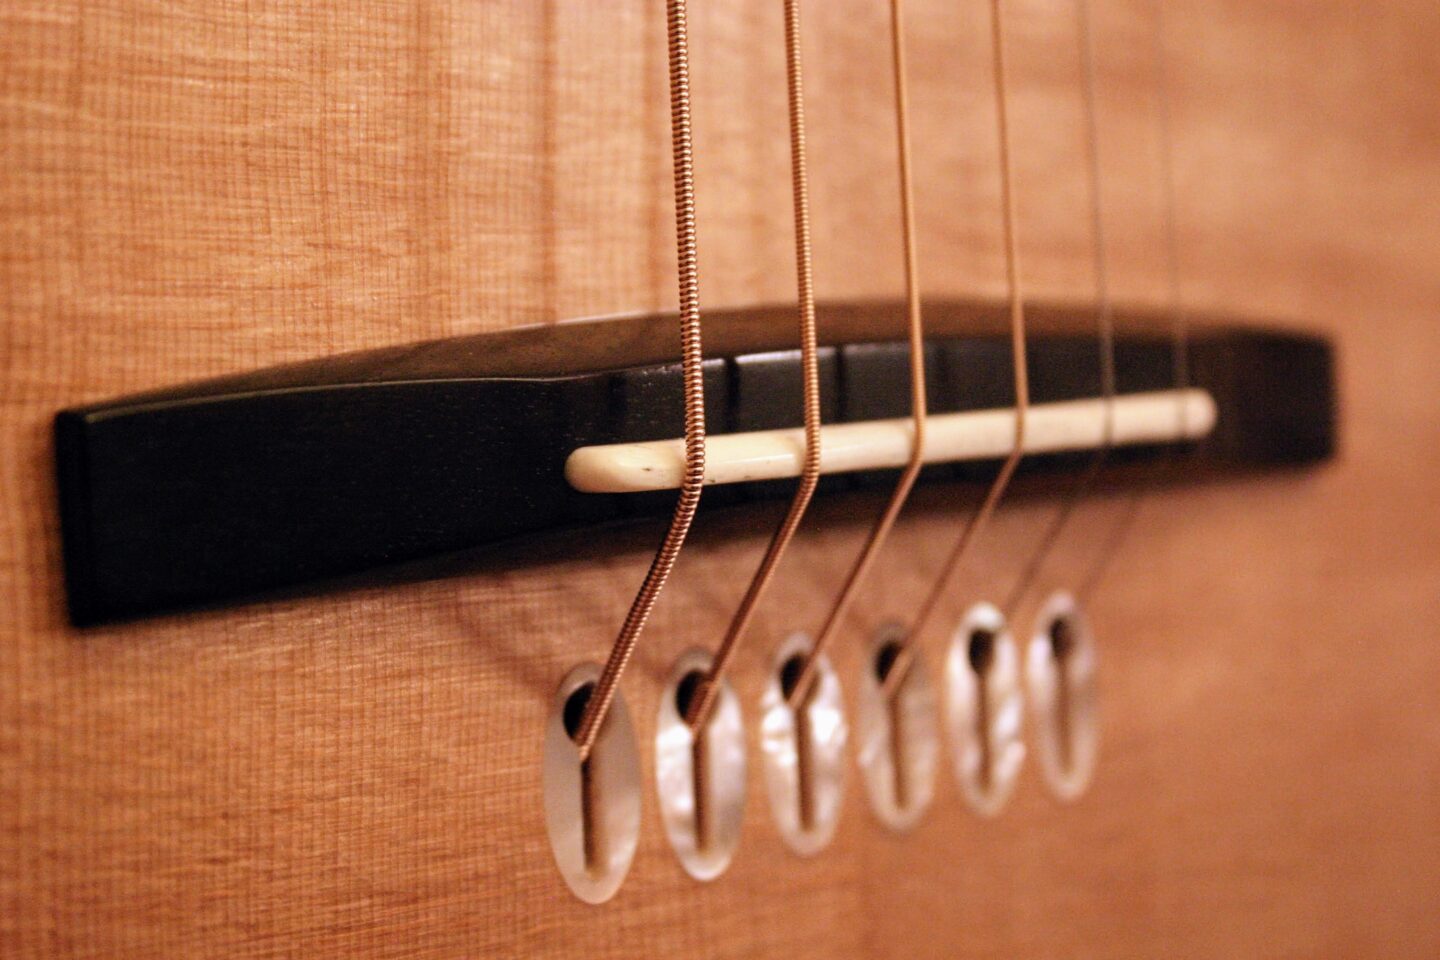
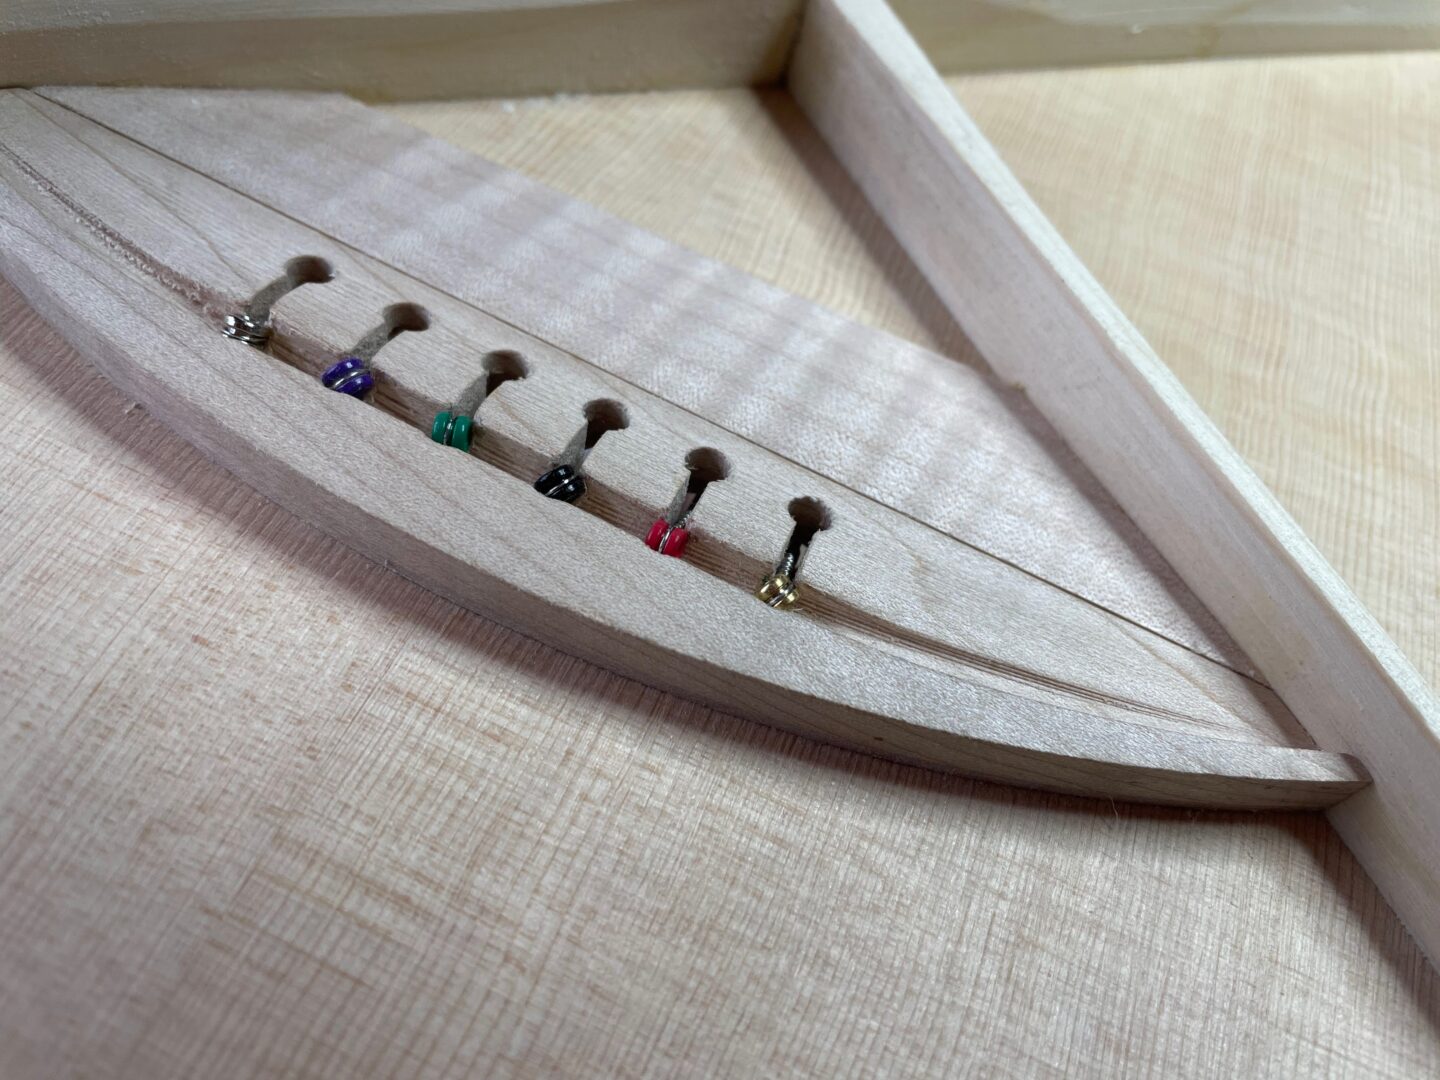
This is my keyhole bridge design
The glue seam on a typical bridge takes almost all the load of the string tension: although the ball ends are inside and touching the bridge plate, the point where the strings turn the corner and first touch the bridge pins is where most of the force pulls on the bridge. In dry climates bridges often break loose or cause cracks in the guitar top since they shrink at different rates and amounts than the guitar top. This new keyhole design avoids several problems and performs the jobs listed above more efficiently.
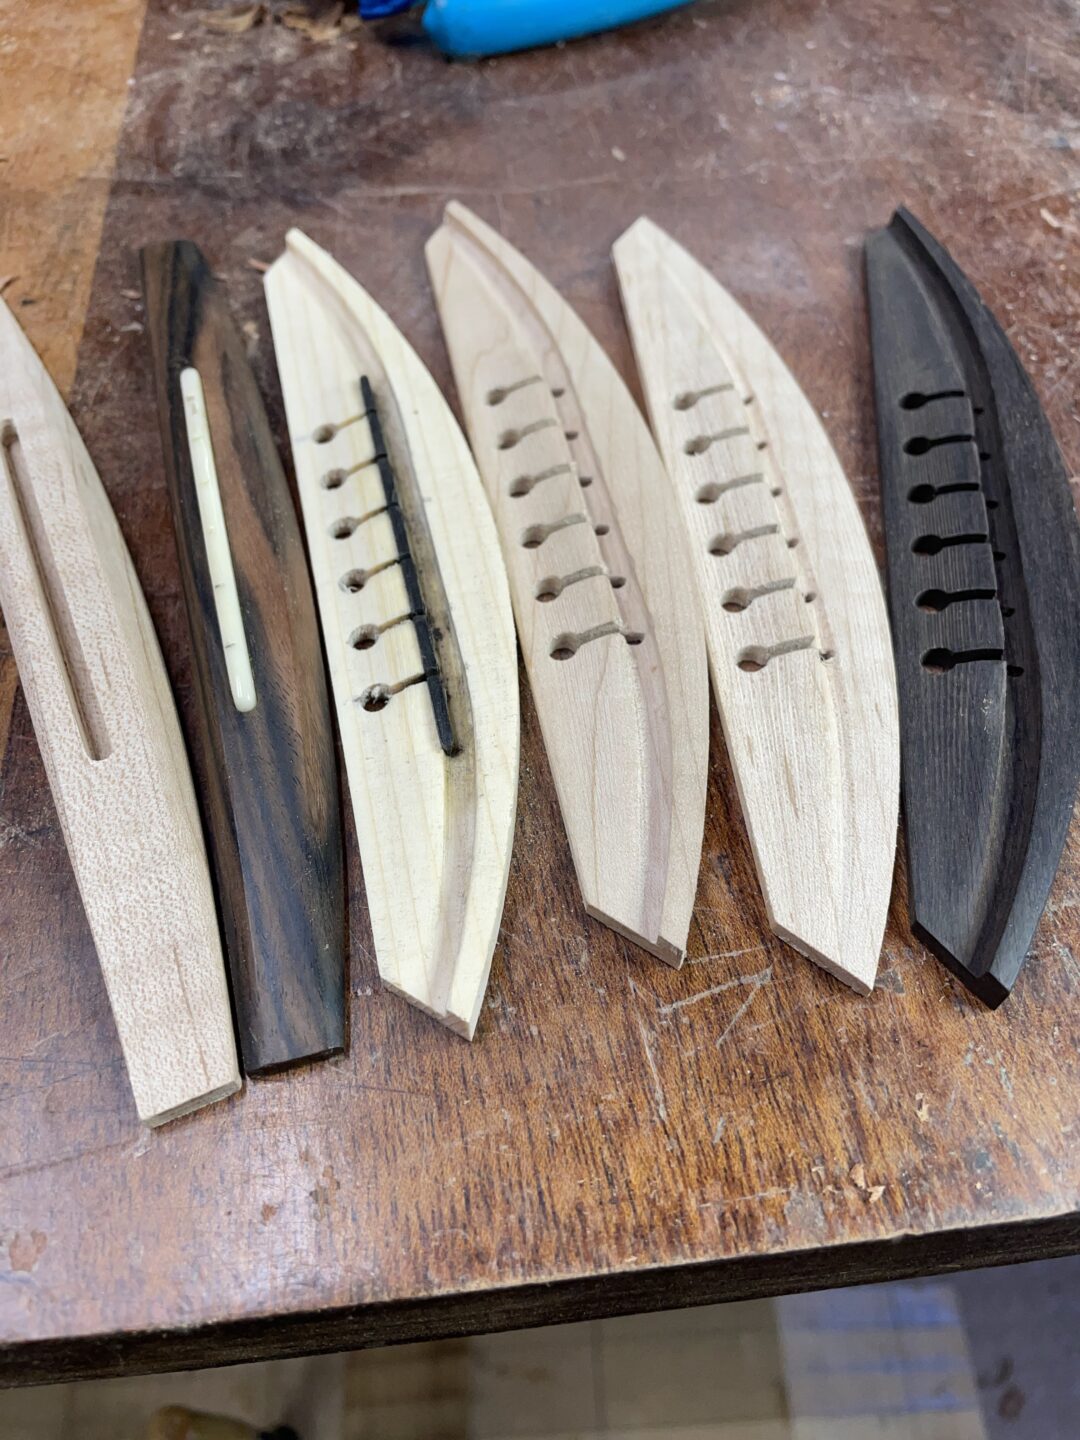
The strings are anchored mechanically via a notch in the bridge plate. It’s almost as if they are attached like a button thru a button hole. The height is set using a floating bridge similar to what you would find on an archtop guitar, and since the neck angle is adjustable the saddle no longer has to be a removable piece of bone. The player can use a bridge that is tall or short, heavy or lightweight, and the saddle can be a traditional bone piece or a piece of fret wire – whatever suits the tone and comfort the player seeks.
The intonation is set by the placement of the floating bridge, and there are registration pins in the top that act as backstops. Channels carved on the underside of the bridge can be adjusted by a luthier if necessary to correct intonation, but placing the bridge in the correct spot when changing strings is simple.
The interior bridge plate consists of two pieces: a thin glued-on bridge plate and a modular ‘deadman‘ anchor piece. The anchor piece can be swapped out whenever the strings are off. If I provide the guitar buyer with a dozen anchor pieces that all have different masses and stiffness, the mid-range response of the guitar is adjustable. Heavier/stiffer bridges emphasize the fundamental at the expense of overtones, while lighter/more flexible plates add interest until eventually the sound gets muddy and loses sustain. This design allows the player to tinker with the output of the guitar until it suits their taste, perhaps even changing the bridge to suit the gauge of strings. Letting the end-user adjust one of the guitar braces (within an acceptable range) is a novel idea that will appeal to many ‘tone-seekers’.
-
- Modular anchor piece that can be swapped out to change the tone
-
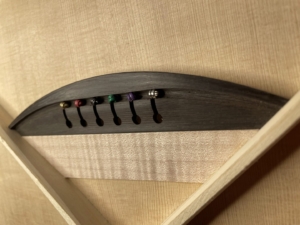
- Modular anchor piece that can be swapped out to change the tone

-
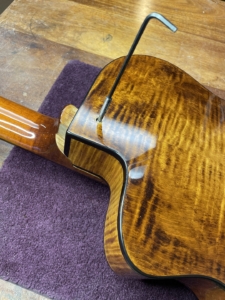
- Adjustment screw

-
- Archtop neck tenon and pickup/fingerrest shelf
-
- Neck mortise
-
- Archtop bridge- the adjustment raises and lowers the treble side while keeping the lowest string at a constant height. The action is set by changing the neck angle, but this allows the bass/treb difference to be set.

-

- This is my adjustable/removable neck joint
-

- options for players – modular bridge pieces to change the tone
-

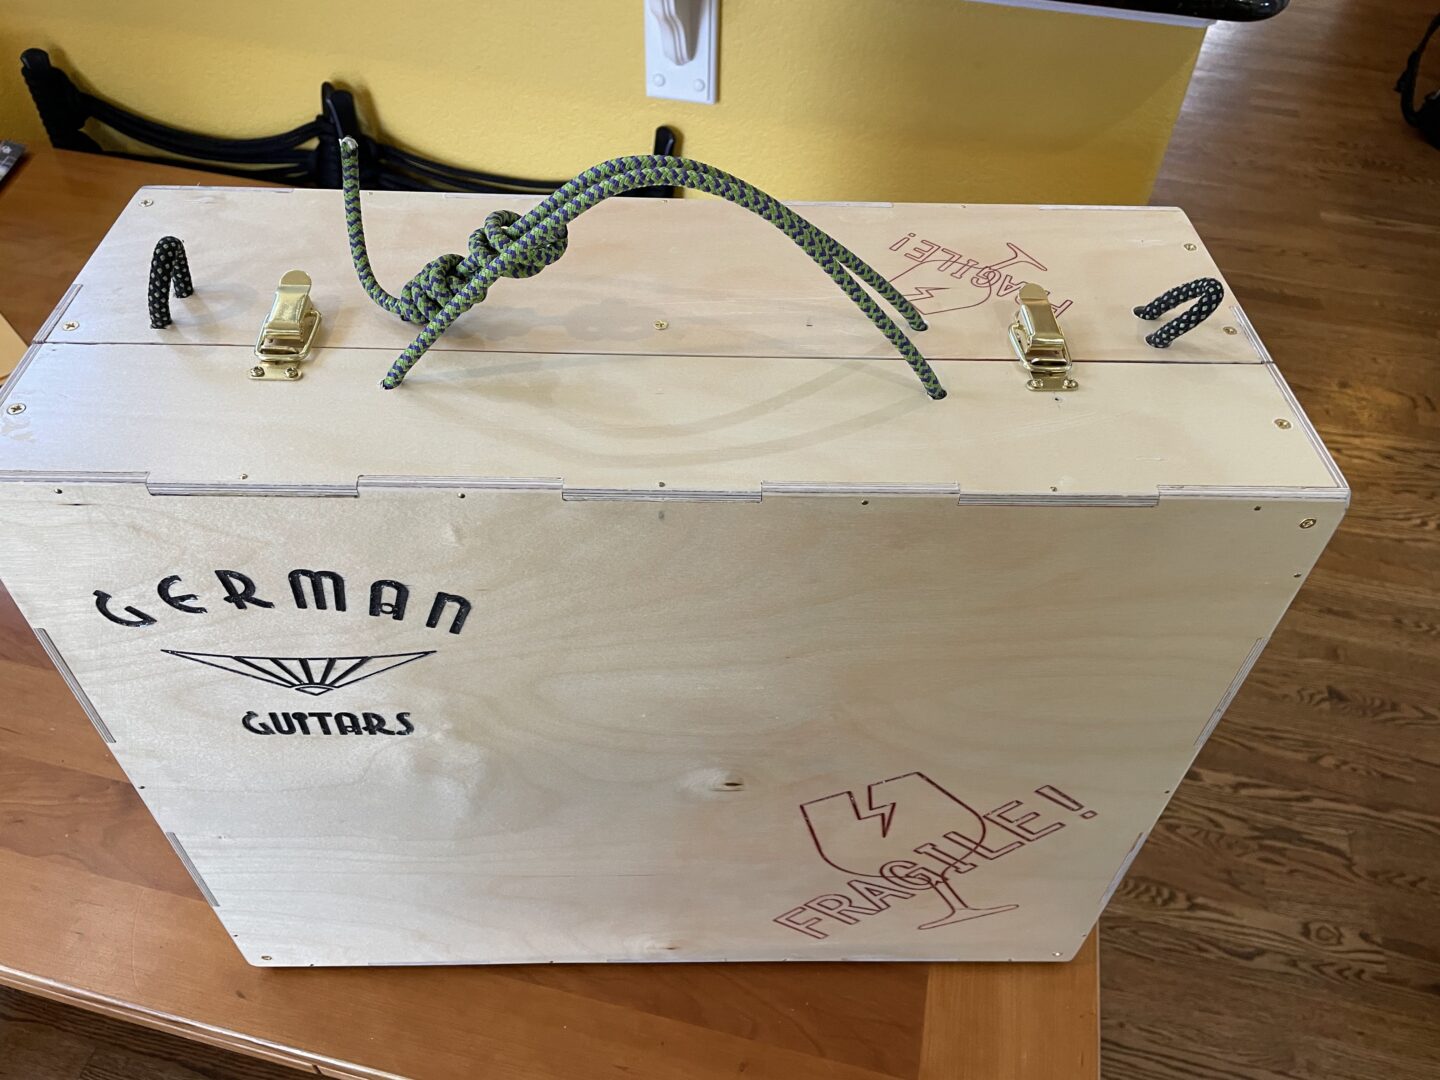
- The guitar can be quickly disassembled to fit in a carry-on box that fits the overhead bin.
___
Q: What is this new neck joint?
This is a cantilever hinge joint with trunnion rails instead of being a bolt-on neck. There is a screw involved in adjusting the action, but it’s job is just to nudge the neck angle back and forth to change it. It would stay at whatever angle you chose if the screw were removed while the guitar was at pitch. The tension is balanced across the joint because the pivot point is hovering approximately 2mm above the 12th fret, right where you want the strings to be.
Q: Why is this advantageous?
- The bridge height does not need to ever change for the life of the guitar since the action will be determined by changing the neck angle. Elderly guitars that need a neck reset get shorter and shorter bridges and the loss of pressure on the top changes the output of the instrument.
- The end user can remove the neck for air travel or shipping. Broken necks are a real worry, and oversize baggage is a travel headache. This design allows the guitar to fit in a carry-on bag or box of those dimensions – never needs to be checked baggage.
- The repairman can remove the neck for fret work or finishing – this is actually a great relief for the luthier that might not be readily apparent to the guitar owner.
- The player can adjust the action in minuscule increments by turning a screw without pulling the instrument out of tune. This is much easier to do than turning the thumbwheels on a typical bridge without the downside of having to re-tune during the trial-and-error process. As a result, you can find the absolute minimum action for your playing at a particular moment- getting the instrument as comfortable as possible. It’s not to say that you can’t do that with any other guitar, but it is much easier to raise and lower the action on the fly with this design.
Q: What gave you the idea for this?
During the pandemic I was asked to build an electric/acoustic upright bass by a local Denver player, Evan Mellichampe. He had designed a very slim-body acoustic bass with about a 15″ upper bout and a narrower lower bout, but ~7″ of body thickness. The idea was to get as much acoustic tone as possible in an instrument that is intended to be plugged in. Ease of travel was another consideration, and Evan had commissioned a prototype about a decade ago that had been built with a traditional set neck. He wanted me to see if I could make a removable neck design. We started with a T-track idea that would have essentially been a bolt-on. This hinge idea struck me in a dream after a month of wracking my brain for an engineering solution. I considered how a sliding dovetail works, and thought, ‘what if I could make a non-tapered dovetail that curved around an axis?’
I searched every woodworking archive I could find for the sort of joint I wanted to make, and it didn’t appear to exist. Japanese joinery is the pinnacle of woodworking complexity, yet curved dovetails aren’t represented there, either. The reason is that the mortise cannot be accurately carved in a single piece of wood by saws and chisels: it must be carved in two halves and glued together like a clam shell. Even with a router, it’s a difficult part to make because the tolerances are tight. The intriguing thing about a curved mortise-and-tenon for the luthier is the amount of surface area contact involved- multiple square inches with mating surfaces following similar arcs. The neck angle on a typical Martin-style dovetail is wholly determined by an 1/8″ wide strip of wood at the top and bottom of the heel. Much of the mating surfaces are chiseled away in relief as the neck is set.
I refined my idea after making a flattop and settled on using trunnion rails made of metal and set into 1/4″ deep grooves in both the neck and neck block. The butt end of the neck still mates with a corresponding curved neck block, and there are two curved shoulder pockets as well. The total surface area is probably 3x that of a typical dovetail without adding a lot of extra mass, so the connection between neck and body is very solid.
Q: How is it adjusted?
My first adjustment idea was a thumbwheel on the heel that would actuate a push rod. The push rod was pinned to the neck, and the thumbwheel was trapped in a bracket on the body. This works, but it moves the neck quickly in about 2 1/2 turns.
The final adjustment mechanism I arrived at uses a differential screw, and I think it’s just amazing. You would think that to have a really fine increment adjustment utilizing a screw would require a really fine thread pattern. You can get a tap and die for 100+ turns-per-inch threads, but the threads are very fragile and prone to stripping or cross-threading. The taps and dies are also exotic and expensive things since they are not commonly used. The differential screw mechanism I have moves the neck a mere 0.008″ per turn so that you need almost 10 turns to cover the same ground. Here’s how that works:
Imagine you have a 1/4-20 threaded rod and you put two nuts on it. Position them so that they are about 1″ apart. If you squeeze both of them with your palm and then turn the rod, the rod would travel thru both of them at the same rate and they would not drift apart or towards one another. Now change the rod so that it has two thread pitches on it, one slightly smaller diameter and finer pitch than the other. It will pass thru the larger nut without touching it and engage with the smaller nut. When the larger, coarser thread engages with the larger nut, the two nuts will begin to drift apart as you turn the screw based on the difference between the pitches. If it takes 20 turns to travel one inch thru the larger nut but 24 turns to travel one inch thru the smaller nut, the smaller nut will get pushed away from the larger nut because it can’t keep up. This is also how some microscope lenses are adjusted: it allows for extremely small motions with no backlash since there is no gearing involved.
The added appeal for this adjustment mechanism is how easy it is to make or replace parts 100 years from now. 1/4-20 and 10-24 threads are the most common screws on the planet, and modifying the 1/4″ set screw to have a bit of finer thread takes about 10 minutes and very few tools, so any luthier could do it.
Q: What about shipping and travel?
I made a travel box for my first flattop guitar with this neck joint that is 21″ x 9″ x 17″. Airlines are most concerned about the length and depth so that it will fit into the overhead bin. There is a clause in the FAA regulations that says that passengers with musical instruments should be allowed to carry on if there is space, but on a crowded plane there are only a few places that a full-sized guitar case will fit. Having the guitar in a carry-on sized box stacks the odds in your favor, and nobody bats an eye at luggage the correct size. Getting thru security is also a breeze- I haven’t yet been asked to open the box there. Even if the box were dropped, the instrument is well protected and the headstock would not get broken.
Q: Once it is apart, how do you re-assemble it?
The pickup and fingerrest are glued together on a 1/8″ wooden foot that has two screws under the fingerboard extension. It comes off as a unit, and the pickup wire terminates in a slim 1/8″ male phono jack that is fed thru a hole in the body. There is a female 1/8″ phono jack inside to connect to the 1/4″ jack at the tail.
To put the neck on, you just align the trunnion rails with the slots and slide it into place. The instrument could be strung up at this point without the adjustment screw in place, but the action would be set at its maximum height.
Push the neck on until it stops, then insert the adjustment screw. Turn it a few turns to engage the 10/24 barrel nut in the neck tenon. after a few turns, 1/4-20 threads will engage with the barrel nut in the block and the neck angle will start to move if you continue. When you adjust this under string tension there will be some creaking sounds, but this is normal – there is a lot of wood being pressed together and it wants to stay put until nudged.
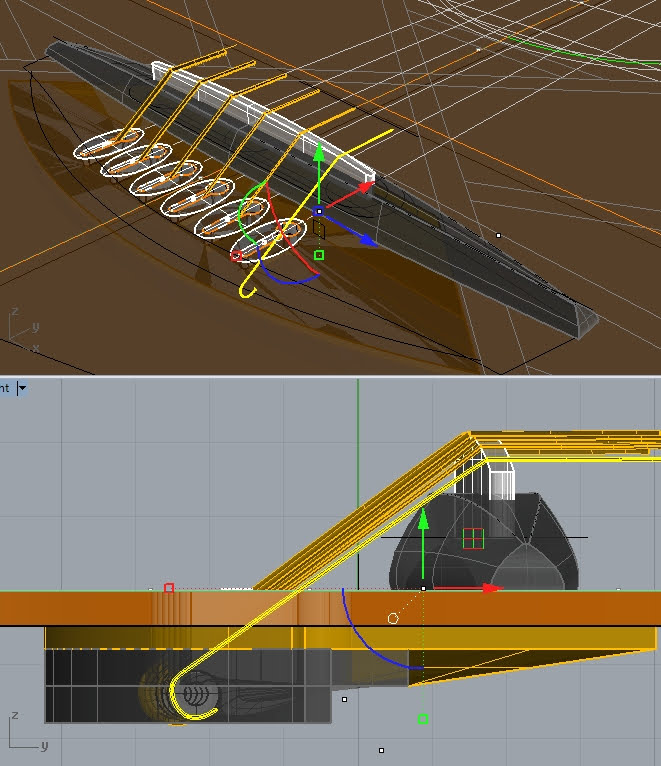
My tailpiece hooks onto a stainless bollard, and the ball end of each string goes thru top-fed keyholes. You can either put the strings on one at a time, or disconnect/connect the tailpiece with all the strings still in their slots.
The bridge has a typical floating foot, but only the treble height can (or needs to) be changed. The bass side of the saddle piece has a foot with a radius, and the center of rotation is the low string. A set screw raises and lowers the treble side so that the difference between bass/treble action can be changed. Some like 2.5/1.5mm, some like 1.0/1.0mm…
Q: why do you use a ‘zero fret’ instead of a more typical nut?
I think the zero fret has gotten a bum reputation without considering the merits of the design. A typical bone nut can certainly be adjusted to the correct height by a talented luthier, but often the slots are left a little high. The reason for this from a repairman’s perspective is that cutting away material with a file is non-reversible, and one stroke too many will mean shimming the nut or making a new one. The zero fret has the advantage of setting the height using an identical fret to the 1st, just as if you were using a capo. It puts the strings at their theoretical minimum which is the most comfortable setting. If the player buzzes on the open string, taking 0.001-2″ off the first fret under a single string is a small adjustment. The nut in this case just serves as a string spacer, and it will never need to be shimmed or replaced after a refret.